接着前面几篇web处理请求的博文,本文将说明,当出现异常的场景下,如404请求url不存在,,403无权,500服务器异常时,我们可以如何处理
I. 环境搭建
首先得搭建一个web应用才有可能继续后续的测试,借助SpringBoot搭建一个web应用属于比较简单的活;
创建一个maven项目,pom文件如下
1
2
3
4
5
6
7
8
9
10
11
12
13
14
15
16
17
18
19
20
21
22
23
24
25
26
27
28
29
30
31
32
33
34
35
36
37
38
39
40
41
42
43
44
45
46
| <parent>
<groupId>org.springframework.boot</groupId>
<artifactId>spring-boot-starter-parent</artifactId>
<version>2.1.7</version>
<relativePath/>
</parent>
<properties>
<project.build.sourceEncoding>UTF-8</project.build.sourceEncoding>
<project.reporting.outputEncoding>UTF-8</project.reporting.outputEncoding>
<spring-cloud.version>Finchley.RELEASE</spring-cloud.version>
<java.version>1.8</java.version>
</properties>
<dependencies>
<dependency>
<groupId>org.springframework.boot</groupId>
<artifactId>spring-boot-starter-web</artifactId>
</dependency>
<dependency>
<groupId>com.alibaba</groupId>
<artifactId>fastjson</artifactId>
<version>1.2.45</version>
</dependency>
</dependencies>
<build>
<pluginManagement>
<plugins>
<plugin>
<groupId>org.springframework.boot</groupId>
<artifactId>spring-boot-maven-plugin</artifactId>
</plugin>
</plugins>
</pluginManagement>
</build>
<repositories>
<repository>
<id>spring-milestones</id>
<name>Spring Milestones</name>
<url>https://repo.spring.io/milestone</url>
<snapshots>
<enabled>false</enabled>
</snapshots>
</repository>
</repositories>
|
依然是一般的流程,pom依赖搞定之后,写一个程序入口
1
2
3
4
5
6
7
8
9
|
@SpringBootApplication
public class Application {
public static void main(String[] args) {
SpringApplication.run(Application.class);
}
}
|
II. 异常页面配置
在SpringBoot项目中,本身提供了一个默认的异常处理页面,当我们希望使用自定义的404,500等页面时,可以如何处理呢?
1. 默认异常页面配置
在默认的情况下,要配置异常页面非常简单,在资源路径下面,新建 error 目录,在下面添加400.html, 500html页面即可
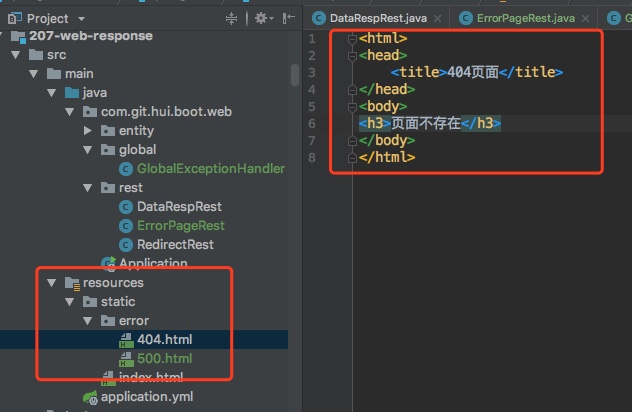
项目结构如上,注意这里的实例demo是没有使用模板引擎的,所以我们的异常页面放在static目录下;如果使用了如FreeMaker模板引擎时,可以将错误模板页面放在template目录下
接下来实际测试下是否生效, 我们先定义一个可能出现服务器500的服务
1
2
3
4
5
6
7
8
9
10
11
| @Controller
@RequestMapping(path = "page")
public class ErrorPageRest {
@ResponseBody
@GetMapping(path = "divide")
public int divide(int sub) {
System.out.println("divide1");
return 1000 / sub;
}
}
|
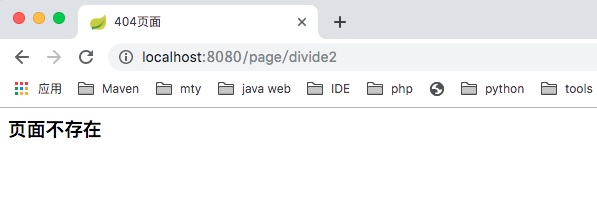
请求一个不存在的url,返回我们定义的400.html页面
1
2
3
4
5
6
7
8
| <html>
<head>
<title>404页面</title>
</head>
<body>
<h3>页面不存在</h3>
</body>
</html>
|
请求一个服务器500异常,返回我们定义的500.html页面
1
2
3
4
5
6
7
8
| <html>
<head>
<title>500页面</title>
</head>
<body>
<h2 style="color: red;">服务器出现异常!!!</h2>
</body>
</html>
|

2. BasicErrorController
看上面的使用比较简单,自然会有个疑问,这个异常页面是怎么返回的呢?
从项目启动的日志中,注意一下RequestMappingHandlerMapping

可以发现里面有个/error的路径不是我们自己定义的,从命名上来看,这个多半就是专门用来处理异常的Controller -> BasicErrorController, 部分代码如下
1
2
3
4
5
6
7
8
9
10
11
12
13
14
15
16
17
18
19
20
21
22
23
24
25
26
27
28
29
| @Controller
@RequestMapping("${server.error.path:${error.path:/error}}")
public class BasicErrorController extends AbstractErrorController {
@Override
public String getErrorPath() {
return this.errorProperties.getPath();
}
@RequestMapping(produces = "text/html")
public ModelAndView errorHtml(HttpServletRequest request,
HttpServletResponse response) {
HttpStatus status = getStatus(request);
Map<String, Object> model = Collections.unmodifiableMap(getErrorAttributes(
request, isIncludeStackTrace(request, MediaType.TEXT_HTML)));
response.setStatus(status.value());
ModelAndView modelAndView = resolveErrorView(request, response, status, model);
return (modelAndView != null) ? modelAndView : new ModelAndView("error", model);
}
@RequestMapping
@ResponseBody
public ResponseEntity<Map<String, Object>> error(HttpServletRequest request) {
Map<String, Object> body = getErrorAttributes(request,
isIncludeStackTrace(request, MediaType.ALL));
HttpStatus status = getStatus(request);
return new ResponseEntity<>(body, status);
}
}
|
这个Controller中,一个返回网页的接口,一个返回Json串的接口;我们前面使用的应该是第一个,那我们什么场景下会使用到第二个呢?
- 通过制定请求头的
Accept,来限定我们只希望获取json的返回即可

3. 小结
本篇内容比较简单,归纳为两句话如下
- 将自定义的异常页面根据http状态码命名,放在
/error目录下
- 在异常状况下,根据返回的http状态码找到对应的异常页面返回
II. 其他
0. 项目
a. 系列博文
b. 项目源码
1. 一灰灰Blog
尽信书则不如,以上内容,纯属一家之言,因个人能力有限,难免有疏漏和错误之处,如发现bug或者有更好的建议,欢迎批评指正,不吝感激
下面一灰灰的个人博客,记录所有学习和工作中的博文,欢迎大家前去逛逛

打赏
如果觉得我的文章对您有帮助,请随意打赏。

微信打赏

支付宝打赏