前面介绍的RestTemplate的所有使用姿势都是不需要鉴权的,然而实际情况可不一定都这么友好;Http Basic Auth属于非常基础的一种鉴权方式了,将用户名和密码以Base64编码之后,携带在请求头,从而实现身份校验;
本文将主要介绍RestTemplate实现Basic Auth鉴权的几种姿势
I. 项目环境
博文测试项目完全基于【WEB系列】RestTemplate基础用法小结 的项目环境,建议配合查看
基本环境:IDEA + maven + SpringBoot 2.2.1.RELEASE
1. 鉴权端点 1 2 3 4 5 6 7 8 9 10 11 12 13 14 15 16 17 18 19 20 21 22 23 24 25 26 27 28 29 30 31 32 33 34 35 36 37 38 39 40 41 42 43 44 45 46 47 48 49 50 51 52 53 54 55 56 57 58 59 60 61 62 63 64 65 66 67 68 69 70 71 72 73 74 75 76 77 private String getHeaders (HttpServletRequest request) { Enumeration<String> headerNames = request.getHeaderNames(); String name; JSONObject headers = new JSONObject (); while (headerNames.hasMoreElements()) { name = headerNames.nextElement(); headers.put(name, request.getHeader(name)); } return headers.toJSONString(); } private String getParams (HttpServletRequest request) { return JSONObject.toJSONString(request.getParameterMap()); } private String getCookies (HttpServletRequest request) { Cookie[] cookies = request.getCookies(); if (cookies == null || cookies.length == 0 ) { return "" ; } JSONObject ck = new JSONObject (); for (Cookie cookie : cookies) { ck.put(cookie.getName(), cookie.getValue()); } return ck.toJSONString(); } private String buildResult (HttpServletRequest request) { return buildResult(request, null ); } private String buildResult (HttpServletRequest request, Object obj) { String params = getParams(request); String headers = getHeaders(request); String cookies = getCookies(request); if (obj != null ) { params += " | " + obj; } return "params: " + params + "\nheaders: " + headers + "\ncookies: " + cookies; } @GetMapping(path = "auth") public String auth (HttpServletRequest request, HttpServletResponse response) throws IOException { String auth = request.getHeader("Authorization" ); if (StringUtils.isEmpty(auth)) { response.setStatus(401 ); response.setHeader("WWW-Authenticate" , "Basic realm=\"input username and password\"" ); return buildResult(request) + "\n>>>no auth header" ; } String[] userAndPass = new String (new BASE64Decoder ().decodeBuffer(auth.split(" " )[1 ])).split(":" ); if (userAndPass.length < 2 ) { response.setStatus(401 ); response.setHeader("WWW-Authenticate" , "Basic realm=\"input username and password\"" ); return buildResult(request) + "\n>>>illegal auth: " + auth; } if ("user" .equalsIgnoreCase(userAndPass[0 ]) && "pwd" .equalsIgnoreCase(userAndPass[1 ])) { return buildResult(request) + "\n>>>auth: success!" ; } response.setStatus(401 ); response.setHeader("WWW-Authenticate" , "Basic realm=\"input username and password\"" ); return buildResult(request) + "\n>>>illegal user or pwd!" ; }
一个简单的鉴权逻辑如上,从请求头中拿到Authorization对应的value,并解析用户名密码,如果满足则正确返回;如果不存在or不满足,则返回http状态码为401,并携带对应的提示信息
II. Basic Auth鉴权姿势 1. 请求头方式 最基础的一种是实现方式,完全根据Basic Auth的规则来,既然是校验请求头,那么我直接在请求头中加上即可
1
2
3
4
5
6
7
8
9
10
RestTemplate restTemplate = new RestTemplate ();HttpHeaders headers = new HttpHeaders ();headers.set("Authorization" , "Basic " + Base64Utils.encodeToString("user:pwd" .getBytes())); HttpEntity<String> ans = restTemplate .exchange("http://127.0.0.1:8080/auth?name=一灰灰&age=20" , HttpMethod.GET, new HttpEntity <>(null , headers), String.class); log.info("auth by direct headers: {}" , ans);
输出
1
2
3
4
(auth by direct headers: <200,params: {"name":["一灰灰"],"age":["20"]} headers: {"authorization":"Basic dXNlcjpwd2Q=","host":"127.0.0.1:8080","connection":"keep-alive","accept":"text/plain, application/json, application/*+json, */*","user-agent":"Java/1.8.0_171"} cookies: >>>auth: success!,[Content-Type:"text/plain;charset=UTF-8", Content-Length:"264", Date:"Mon, 29 Jun 2020 09:46:06 GMT"]>
2. 拦截器方式 上面的方式不太通用,借助前面的请求头设置姿势,如果有通用的需求,借助拦截器是一个好的选择
1 2 3 4 5 6 7 8 ClientHttpRequestInterceptor interceptor = (httpRequest, bytes, execution) -> { httpRequest.getHeaders().set("Authorization" , "Basic " + Base64Utils.encodeToString("user:pwd" .getBytes())); return execution.execute(httpRequest, bytes); }; restTemplate.getInterceptors().add(interceptor); ans = restTemplate.getForEntity("http://127.0.0.1:8080/auth?name=一灰灰&age=20" , String.class); log.info("auth by interceptor: {}" , ans);
输出
1
2
3
4
(auth by interceptor: <200,params: {"name":["一灰灰"],"age":["20"]} headers: {"authorization":"Basic dXNlcjpwd2Q=","host":"127.0.0.1:8080","connection":"keep-alive","accept":"text/plain, application/json, application/*+json, */*","user-agent":"Java/1.8.0_171"} cookies: >>>auth: success!,[Content-Type:"text/plain;charset=UTF-8", Content-Length:"264", Date:"Mon, 29 Jun 2020 09:46:06 GMT"]>
3. 标准验证拦截器 上面的拦截器主要还是我们自己来设置请求头,实际上Spring已经提供了标准的BasicAuthenticationInterceptor来实现我们的需求
1 2 3 4 5 restTemplate = new RestTemplate (); restTemplate.getInterceptors().add(new BasicAuthenticationInterceptor ("user" , "pwd" )); ans = restTemplate.getForEntity("http://127.0.0.1:8080/auth?name=一灰灰&age=20" , String.class); log.info("auth by interceptor: {}" , ans);
输出
1
2
3
4
(auth by interceptor: <200,params: {"name":["一灰灰"],"age":["20"]} headers: {"authorization":"Basic dXNlcjpwd2Q=","host":"127.0.0.1:8080","connection":"keep-alive","accept":"text/plain, application/json, application/*+json, */*","user-agent":"Java/1.8.0_171"} cookies: >>>auth: success!,[Content-Type:"text/plain;charset=UTF-8", Content-Length:"264", Date:"Mon, 29 Jun 2020 09:46:06 GMT"]>
4. RestTemplateBuilder方式创建RestTemplate RestTemplate除了使用new来构造之外,还可以借助RestTemplateBuilder来创建,有时候可能更加方便简洁
1 2 3 4 restTemplate = new RestTemplateBuilder ().basicAuthentication("user" , "pwd" ).build(); ans = restTemplate.getForEntity("http://127.0.0.1:8080/auth?name=一灰灰&age=20" , String.class); log.info("auth by RestTemplateBuilder: {}" , ans);
输出
1
2
3
4
(auth by RestTemplateBuilder: <200,params: {"name":["一灰灰"],"age":["20"]} headers: {"authorization":"Basic dXNlcjpwd2Q=","content-length":"0","host":"127.0.0.1:8080","connection":"Keep-Alive","accept-encoding":"gzip","accept":"text/plain, application/json, application/*+json, */*","user-agent":"okhttp/3.14.4"} cookies: >>>auth: success!,[Content-Length:"309", Content-Type:"text/plain;charset=UTF-8", Date:"Mon, 29 Jun 2020 09:46:06 GMT"]>
5. 反面case 上面介绍的几种都是正常可以工作的,接下来给出一个不能工作的case
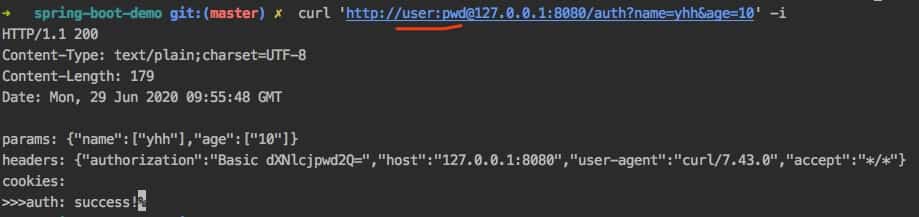
对于Basic Auth,有一种常见的方式是将用户名和密码,放在url里面,如
那么我们直接用RestTemplate这么操作呢?
1
2
3
4
5
6
7
8
try { restTemplate = new RestTemplate (); ans = restTemplate.getForEntity("http://user:pwd@127.0.0.1:8080/auth?name=一灰灰&age=20" , String.class); log.info("auth by url mode: {}" , ans); } catch (Exception e) { log.info("auth exception: {}" , e.getMessage()); }
输出
1 (auth exception: 401 Unauthorized
注意直接在url里面添加用户名密码的方式是不行的,需要额外处理
II. 其他 0. 项目&系列博文 博文
源码
1. 一灰灰Blog 尽信书则不如,以上内容,纯属一家之言,因个人能力有限,难免有疏漏和错误之处,如发现bug或者有更好的建议,欢迎批评指正,不吝感激
下面一灰灰的个人博客,记录所有学习和工作中的博文,欢迎大家前去逛逛
打赏
如果觉得我的文章对您有帮助,请随意打赏。
微信打赏
支付宝打赏