4.图片合成使用示例
约 2203 字大约 7 分钟
本文为 image-plugin 图片合成的使用参考示例
1. 项目依赖
直接从中央仓库,导入最新依赖
<!-- https://mvnrepository.com/artifact/com.github.liuyueyi.media/image-plugin -->
<dependency>
    <groupId>com.github.liuyueyi.media</groupId>
    <artifactId>image-plugin</artifactId>
    <!-- 请使用最新版本号替换下面的版本 -->
    <version>3.1.0</version>
</dependency>
2. 参数说明
相关参数配置由com.github.hui.quick.plugin.image.wrapper.create.ImgCreateOptions实体类进行装载,对应的参数说明如下
| 参数名 | 类型 | 说明 |
|---|---|---|
| bgImg | BufferedImage | 绘制的背景图 |
| imgW | Integer | 生成图片的宽 |
| imgH | Integer | 生成图片的高 |
| font | Font | 字体,默认值为 DEFAULT_FONT |
| fontColor | Color | 字体色,默认值为黑色 |
| leftPadding | int | 左边距 |
| rightPadding | int | 右边距 |
| topPadding | int | 上边距 |
| bottomPadding | int | 底边距 |
| linePadding | int | 行距 |
| alignStyle | AlignStyle | 对齐方式,水平绘制时为左对齐、居中、右对齐;垂直绘制时为上对齐、居中、下对齐 |
| drawStyle | DrawStyle | 文本绘制方式,水平或垂直 |
3. 使用示例
所有的使用姿势,可以在源码对应的test工程中获取
下文对应的示例,详情查看: ImgCreateWrapperTest.java
3.1 基本使用示例
@Test
public void testLocalGenImg() throws IOException {
    int w = 400;
    int leftPadding = 10;
    int topPadding = 20;
    int bottomPadding = 10;
    int linePadding = 10;
    Font font = new Font("手札体", Font.PLAIN, 18); // 需要操作系统有手札字体,否则用默认的

    ImgCreateWrapper.Builder build = ImgCreateWrapper.build()
            .setImgW(w) // 设置图片宽
            .setLeftPadding(leftPadding) // 左边距
            .setRightPadding(leftPadding) // 右边距
            .setTopPadding(topPadding) // 上边距
            .setBottomPadding(bottomPadding) // 下边距
            .setLinePadding(linePadding) // 行间距
            .setFont(font) // 字体
            .setAlignStyle(ImgCreateOptions.AlignStyle.CENTER) // 文字对齐方式
            .setDrawStyle(ImgCreateOptions.DrawStyle.HORIZONTAL) // 绘制样式,水平绘制
            .setBgColor(Color.WHITE) // 背景色为白色
            .setBorder(true) // 输出图片有边框
            .setBorderColor(0xFFF7EED6); // 边框颜色


    BufferedReader reader = FileReadUtil.createLineRead("text/poem.txt"); // 读取文字样本
    String line;
    while ((line = reader.readLine()) != null) {
        build.drawContent(line);
    }

    build.setAlignStyle(ImgCreateOptions.AlignStyle.RIGHT)
            .drawImage("https://spring.hhui.top/spring-blog/imgs/info/info.png");

    BufferedImage img = build.asImage();
    ImageIO.write(img, "png", new File("/tmp/2out.png"));
}
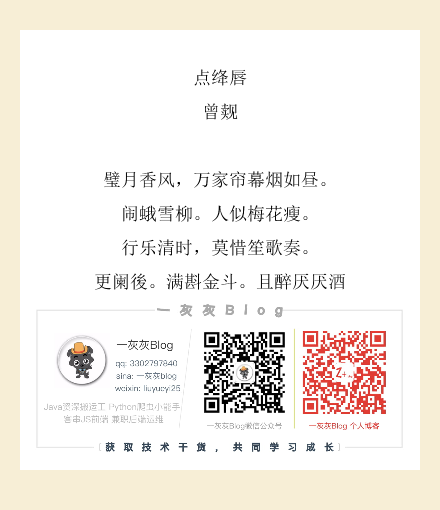
如我们希望生成竖排输出的图文,可以在上面的基础上做一个微调即可快速实现,如下
@Test
public void testLocalGenVerticalImg() throws IOException, FontFormatException {
    int h = 400;
    int leftPadding = 10;
    int topPadding = 10;
    int bottomPadding = 10;
    int linePadding = 10;
    Font font = FontUtil.getFont("font/txlove.ttf", Font.PLAIN, 20);

    ImgCreateWrapper.Builder build = ImgCreateWrapper.build()
            .setImgH(h)
            .setDrawStyle(ImgCreateOptions.DrawStyle.VERTICAL_RIGHT)
            .setAlignStyle(ImgCreateOptions.AlignStyle.CENTER)
            .setLeftPadding(leftPadding)
            .setTopPadding(topPadding)
            .setBottomPadding(bottomPadding)
            .setLinePadding(linePadding)
            .setFont(font)
            .setBgColor(Color.WHITE)
            .setBorder(true)
            .setBorderBottomPadding(8)
            .setBorderLeftPadding(6)
            .setBorderTopPadding(8)
            .setBorderColor(0xFFF7EED6);


    BufferedReader reader = FileReadUtil.createLineRead("text/poem.txt");
    String line;
    while ((line = reader.readLine()) != null) {
        build.drawContent(line);
    }

    build.setFont(FontUtil.getFontOrDefault(null, Font.ITALIC, 18))
            .setAlignStyle(ImgCreateOptions.AlignStyle.BOTTOM);
    build.drawContent(new SimpleDateFormat("yyyy-MM-dd").format(new Date()));
    build.drawContent(" ");
    build.setAlignStyle(ImgCreateOptions.AlignStyle.CENTER)
            .drawImage("https://spring.hhui.top/spring-blog/imgs/info/info.png");
    build.setFontColor(Color.BLUE).drawContent("后缀签名").drawContent("一灰灰");

    BufferedImage img = build.asImage();
    ImageIO.write(img, "png", new File("/tmp/v2out.png"));
}
若我们希望在文字中间穿插图片,并设置对文字设置不同的颜色、字体、样式时,可以参照下面的实现方式
@Test
public void testGenImg() throws IOException {
    int w = 400;
    int leftPadding = 10;
    int topPadding = 40;
    int bottomPadding = 40;
    int linePadding = 10;
    Font font = new Font("宋体", Font.PLAIN, 18);

    ImgCreateWrapper.Builder build = ImgCreateWrapper.build()
            .setImgW(w)
            .setLeftPadding(leftPadding)
            .setTopPadding(topPadding)
            .setBottomPadding(bottomPadding)
            .setLinePadding(linePadding)
            .setFont(font)
            .setAlignStyle(ImgCreateOptions.AlignStyle.CENTER)
            .setDrawStyle(ImgCreateOptions.DrawStyle.HORIZONTAL)
            .setBgImg(ImageLoadUtil.getImageByPath("createImg/bg.jpeg"))
            .setBgColor(Color.WHITE)
            .setBorder(true)
            .setBorderColor(0xFFF7EED6);


    BufferedReader reader = FileReadUtil.createLineRead("text/poem2.txt");
    String line;
    int index = 0;
    while ((line = reader.readLine()) != null) {
        build.drawContent(line);

        if (++index == 5) {
            build.drawImage(ImageLoadUtil.getImageByPath("https://static.oschina.net/uploads/img/201708/12175633_sOfz.png"));
        }

        if (index == 7) {
            build.setFontSize(25);
        }

        if (index == 10) {
            build.setFontSize(20);
            build.setFontColor(Color.RED);
        }
    }

    BufferedImage img = build.asImage();
    ImageIO.write(img, "png", new File("/tmp/more2out.png"));
}

3.2 逐行打印文本,生成gif动画
主要参数同上,使用姿势可以参考: LineCreateWrapperTest
具体的使用示例与上面基本没有什么区别,无非是输出的图是gif动图
private static final String sign = "https://spring.hhui.top/spring-blog/imgs/info/info.png";

@Test
public void genVerticalImg() throws IOException, FontFormatException {
    int h = 500;
    int leftPadding = 10;
    int topPadding = 10;
    int bottomPadding = 10;
    int linePadding = 10;

    LineGifCreateWrapper.Builder build = (LineGifCreateWrapper.Builder) LineGifCreateWrapper.build()
            .setImgH(h)
            .setDrawStyle(ImgCreateOptions.DrawStyle.VERTICAL_RIGHT)
            .setLeftPadding(leftPadding)
            .setTopPadding(topPadding)
            .setBottomPadding(bottomPadding)
            .setLinePadding(linePadding)
            .setFont(FontUtil.DEFAULT_FONT)
            .setFontColor(Color.BLUE)
            .setAlignStyle(ImgCreateOptions.AlignStyle.CENTER)
            .setBgColor(Color.WHITE)
            .setBorder(true)
            .setBorderColor(0xFFF7EED6);


    BufferedReader reader = FileReadUtil.createLineRead("text/poem.txt");
    String line;
    while ((line = reader.readLine()) != null) {
        build.drawContent(line);
    }

    build.setAlignStyle(ImgCreateOptions.AlignStyle.BOTTOM)
            .drawImage(sign);

    build.asGif("/tmp/line.gif");
}
3.3 逐字输出,生成gif动画
主要参数同上,使用姿势可以参考: LineCreateWrapperTest
private static final String sign = "https://spring.hhui.top/spring-blog/imgs/info/info.png";
@Test
public void testWordGif() throws IOException {
    int h = 300;
    int leftPadding = 10;
    int topPadding = 10;
    int bottomPadding = 10;
    int linePadding = 10;

    WordGifCreateWrapper.Builder build = (WordGifCreateWrapper.Builder) WordGifCreateWrapper.build()
            .setDelay(100)
            .setImgH(h)
            .setImgW(h)
            .setDrawStyle(ImgCreateOptions.DrawStyle.VERTICAL_RIGHT)
            .setLeftPadding(leftPadding)
            .setTopPadding(topPadding)
            .setBottomPadding(bottomPadding)
            .setLinePadding(linePadding)
            .setFont(FontUtil.DEFAULT_FONT)
            .setAlignStyle(ImgCreateOptions.AlignStyle.CENTER)
            .setBgColor(Color.WHITE)
            .setBorder(true)
            .setBorderColor(0xFFF7EED6)
            ;


    BufferedReader reader = FileReadUtil.createLineRead("text/poem.txt");
    String line;
    while ((line = reader.readLine()) != null) {
        build.drawContent(line);
    }

    build.drawContent(" ");

    build.setAlignStyle(ImgCreateOptions.AlignStyle.CENTER)
            .drawImage(sign);

    build.asGif("/tmp/line.gif");
}
4. 进阶使用
上面介绍的使用姿势适用于简单的图文合成,当我们有一些相对复杂的图片需要合成时,可以考虑一下基于模板的图文合成方式
这里主要使用的是 ImgMergeWrapper 提供的能力,其内部提供了五个基本单元(也支持扩展自己的基本绘制单元)
4.1 基础绘制单元
如需要实现自定义的绘制单元,则可以通过实现下面的接口
public interface IMergeCell {


    void draw(Graphics2D g2d);

}
image-plugin原生提供的几个实现如下
- TextCell: 文字绘制,支持超出最终输出图片的宽高时,自动换行
- LineCell: 线条绘制,原生提供实线和虚线两种样式,也可以自定义线条样式
- RectCell: 矩形框绘制
- RectFillCell: 矩形区域绘制
- ImgCell: 图片绘制
4.2 基本使用
下面是一个简单的示例,生成书籍封面图,一张底图,一个矩形框,一个矩形区域,然后再矩形区域内填充书名
@Test
public void gen() throws IOException {
    try {
        testCover("我师兄实在太稳健了", "cover");
        testCover("射雕英雄传", "cover2");
    } catch (Exception e) {
    }
}

public void testCover(String text, String out) throws IOException {
    int w = 276, h = 402;
    BufferedImage bg = ImageLoadUtil.getImageByPath("cover.jpg");


    TextCell textCell = new TextCell();
    textCell.setColor(Color.BLACK);
    textCell.addText(text);
    textCell.setFont(new Font("苹方", Font.PLAIN, 32));
    int textX = 13 * w / (13 + 12 + 67);
    textCell.setStartX(textX);
    int textY = (int) (23.5 * h / (23.5 + 13 + 86)) + 28;
    textCell.setStartY(textY);
    textCell.setEndX(w - textX);
    textCell.setEndY(textY);
    textCell.setDrawStyle(ImgCreateOptions.DrawStyle.HORIZONTAL);
    textCell.setAlignStyle(ImgCreateOptions.AlignStyle.CENTER);
    int textHeight = textCell.getDrawHeight();


    RectFillCell fillCell = new RectFillCell();
    textY = textY - 32;
    fillCell.setX(textX - 15);
    fillCell.setY(textY - 15);
    fillCell.setW(w - 2 * textX + 30);
    fillCell.setH(textHeight + 30);
    fillCell.setRadius(8);
    fillCell.setColor(Color.LIGHT_GRAY);


    RectCell rectCell = new RectCell();
    rectCell.setX(textX - 21);
    rectCell.setY(textY - 21);
    rectCell.setW(w - 2 * textX + 42);
    rectCell.setH(textHeight + 42);
    rectCell.setColor(Color.LIGHT_GRAY);
    rectCell.setRadius(12);
    rectCell.setStroke(new BasicStroke(2));


    Graphics2D g2d = GraphicUtil.getG2d(bg);
    List<IMergeCell> list = new ArrayList<>();
    list.add(rectCell);
    list.add(fillCell);
    list.add(textCell);
    list.stream().forEach(s -> s.draw(g2d));

    System.out.println("---绘制完成---");
    try {
        ImageIO.write(bg, "png", new File("/tmp/cover/" + out + ".png"));
    } catch (Exception e) {
        e.printStackTrace();
    }
}
| 输出1 | 输出2 |
|---|---|
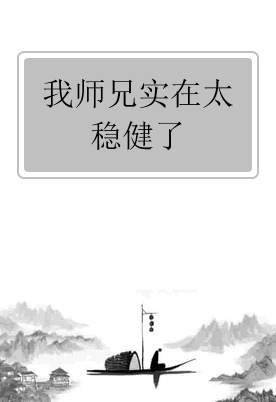 | 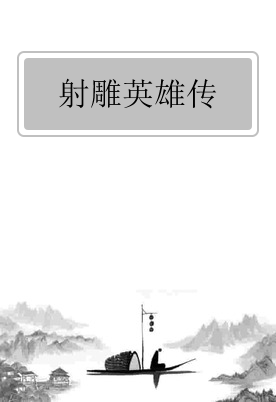 |
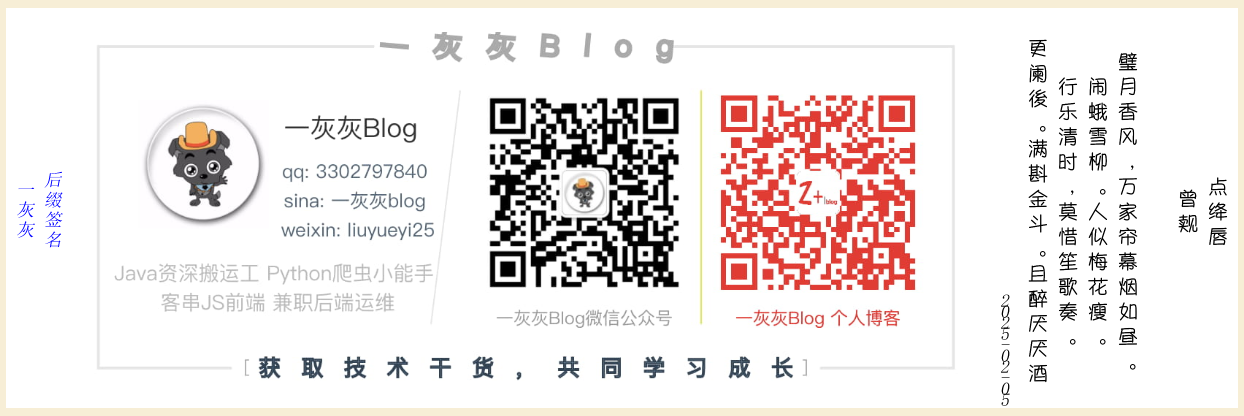
4.3 模板复用
我们可以定义自己的合成模板,然后通过传入不同的参数来生成不同的图片;比如原生提供了一个二维码签名的模板
关键点在于 QrCodeCardTemplateBuilder 的实现
public class QrCodeCardTemplateBuilder {


    public static List<IMergeCell> build(BufferedImage logo,
                                         String name,
                                         List<String> desc,
                                         BufferedImage qrcode,
                                         String title) {
        List<IMergeCell> list = new ArrayList<>();

        list.add(buildBg());
        list.add(buildTextLogo(logo));
        list.addAll(buildTextInfo(name, desc));
        list.add(buildLine());
        list.add(buildQrCode(qrcode));
        list.add(buildQrCodeInfo());
        list.add(buildRectInfo());
        list.addAll(buildTitle(title));


        return list;
    }

    private static RectFillCell buildBg() {
        RectFillCell rectFillCell = RectFillCell.builder()
                .w(QrCodeCardTemplate.w)
                .h(QrCodeCardTemplate.h)
                .x(0)
                .y(0)
                .color(QrCodeCardTemplate.bg_color)
                .build();
        return rectFillCell;
    }


    private static ImgCell buildTextLogo(BufferedImage logo) {
        // logo
        logo = ImageOperateUtil.makeRoundImg(logo, false, null);
        return ImgCell.builder()
                .img(logo)
                .x(((QrCodeCardTemplate.text_size - QrCodeCardTemplate.text_logo_size) >>> 1) + QrCodeCardTemplate.text_x)
                .y(QrCodeCardTemplate.text_y)
                .w(QrCodeCardTemplate.text_logo_size)
                .h(QrCodeCardTemplate.text_logo_size)
                .build();
    }


    private static List<TextCell> buildTextInfo(String name, List<String> desc) {
        // 文案
        FontMetrics nameFontMetrics = FontUtil.getFontMetric(QrCodeCardTemplate.text_nameFont);
        int nameY = QrCodeCardTemplate.text_y + QrCodeCardTemplate.text_logo_size
                + QrCodeCardTemplate.text_line_space
                + nameFontMetrics.getHeight()
                + nameFontMetrics.getDescent();

        TextCell nameCell = new TextCell();
        nameCell.setFont(QrCodeCardTemplate.text_nameFont);
        nameCell.setColor(QrCodeCardTemplate.text_nameFont_color);
        nameCell.setStartX(QrCodeCardTemplate.text_x);
        nameCell.setStartY(nameY);
        nameCell.setEndX(QrCodeCardTemplate.text_x + QrCodeCardTemplate.text_size);
        nameCell.setEndY(nameY + nameFontMetrics.getHeight());
        nameCell.addText(name);
        nameCell.setDrawStyle(ImgCreateOptions.DrawStyle.HORIZONTAL);
        nameCell.setAlignStyle(ImgCreateOptions.AlignStyle.CENTER);


        // 说明文案
        FontMetrics descFontMetrics = FontUtil.getFontMetric(QrCodeCardTemplate.text_descFont);
        int descY = nameY + nameFontMetrics.getHeight() + QrCodeCardTemplate.text_line_space;
        TextCell descCell = new TextCell();
        descCell.setFont(QrCodeCardTemplate.text_descFont);
        descCell.setColor(QrCodeCardTemplate.text_descFont_color);
        descCell.setStartX(QrCodeCardTemplate.text_x);
        descCell.setStartY(descY);
        descCell.setEndX(QrCodeCardTemplate.text_x + QrCodeCardTemplate.text_size);
        descCell.setEndY(descY + desc.size() * descFontMetrics.getHeight());
        // 单行超过限制的需要分割
        descCell.setTexts(desc);
        descCell.setDrawStyle(ImgCreateOptions.DrawStyle.HORIZONTAL);
        descCell.setAlignStyle(ImgCreateOptions.AlignStyle.CENTER);


        return Arrays.asList(nameCell, descCell);
    }


    private static LineCell buildLine() {
        // line
        return LineCell.builder()
                .x1(QrCodeCardTemplate.line_x)
                .y1(QrCodeCardTemplate.line_y + QrCodeCardTemplate.line_h)
                .x2(QrCodeCardTemplate.line_x + QrCodeCardTemplate.line_w)
                .y2(QrCodeCardTemplate.line_y)
                .color(QrCodeCardTemplate.line_color)
                .build();
    }


    private static ImgCell buildQrCode(BufferedImage qrcode) {

        int qrCodeX = QrCodeCardTemplate.qrcode_x + ((QrCodeCardTemplate.qrcode_info_w - QrCodeCardTemplate.qrcode_size) >>> 1);

        return ImgCell.builder()
                .img(qrcode)
                .x(qrCodeX)
                .y(QrCodeCardTemplate.qrcode_y)
                .w(QrCodeCardTemplate.qrcode_size)
                .h(QrCodeCardTemplate.qrcode_size)
                .build();
    }


    private static TextCell buildQrCodeInfo() {
        Font font = QrCodeCardTemplate.qrcode_info_font;
        FontMetrics fontMetrics = FontUtil.getFontMetric(font);
        int startY = QrCodeCardTemplate.qrcode_y
                + QrCodeCardTemplate.qrcode_size
                + QrCodeCardTemplate.qrcode_info_padding
                + fontMetrics.getHeight();

        TextCell textCell = new TextCell();
        textCell.setStartX(QrCodeCardTemplate.qrcode_x);
        textCell.setEndX(QrCodeCardTemplate.w - QrCodeCardTemplate.border_space);
        textCell.setStartY(startY);
        textCell.setEndY(startY + fontMetrics.getHeight());
        textCell.setFont(font);
        textCell.setColor(QrCodeCardTemplate.qrcode_info_color);
        textCell.setAlignStyle(ImgCreateOptions.AlignStyle.CENTER);
        textCell.addText("点击或长按关注");
        return textCell;
    }


    private static RectCell buildRectInfo() {
        RectCell rectCell = new RectCell();
        rectCell.setColor(Color.LIGHT_GRAY);
        rectCell.setX(QrCodeCardTemplate.border_space >>> 1);
        rectCell.setY(QrCodeCardTemplate.border_space >>> 1);
        rectCell.setW(QrCodeCardTemplate.w - QrCodeCardTemplate.border_space);
        rectCell.setH(QrCodeCardTemplate.h - QrCodeCardTemplate.border_space);

        return rectCell;
    }


    private static List<IMergeCell> buildTitle(String title) {
        Font titleFont = QrCodeCardTemplate.title_font;
        FontMetrics metrics = FontUtil.getFontMetric(titleFont);


        int w = QrCodeCardTemplate.w;
        int spacing = QrCodeCardTemplate.title_padding;


        int tw = metrics.stringWidth(title);

        RectFillCell rectFillCell = RectFillCell.builder()
                .x((w - tw - metrics.getHeight() - metrics.getHeight()) >>> 1 )
                .y(spacing >>> 1)
                .w(tw + metrics.getHeight() * 2)
                .h(spacing)
                .font(titleFont)
                .color(QrCodeCardTemplate.title_font_bg_color)
                .build();


        TextCell textCell = new TextCell();
        textCell.setStartX(0);
        textCell.setEndX(w);
        textCell.setStartY(spacing + titleFont.getSize() / 2 - metrics.getDescent());
        textCell.setEndY(textCell.getStartY());
        textCell.setAlignStyle(ImgCreateOptions.AlignStyle.CENTER);
        textCell.setDrawStyle(ImgCreateOptions.DrawStyle.HORIZONTAL);
        textCell.addText(title);
        textCell.setFont(titleFont);
        textCell.setColor(QrCodeCardTemplate.title_font_color);


        return Arrays.asList(rectFillCell, textCell);
    }
}
然后对应的使用姿势就非常简单了
@Test
public void testTemplate() throws IOException {
    BufferedImage logo = ImageLoadUtil.getImageByPath("logo.jpg");
    BufferedImage qrCode = ImageLoadUtil.getImageByPath("QrCode.jpg");
    String name = "小灰灰Blog";
    List<String> desc = Arrays.asList(" 无聊的码农,不定时分享各种博文 ");

    int w = QrCodeCardTemplate.w, h = QrCodeCardTemplate.h;
    List<IMergeCell> list = QrCodeCardTemplateBuilder.build(logo, name, desc, qrCode, "微 信 公 众 号");

    BufferedImage bg = ImgMergeWrapper.merge(list, w, h);

    try {
        ImageIO.write(bg, "jpg", new File("/tmp/merge.jpg"));
    } catch (Exception e) {
        e.printStackTrace();
    }
}
上面的输出图,实际上就是我的个人推介名片

Loading...